Scrapendipity : scrap·en·dip·i·ty

The gift of making fortunate discoveries by accident, a talent for making discoveries while searching for other things.


Tuesday, May 26, 2015

My First Pocket Letter!

Karla here today to share the very first Pocket Letter I have ever done, and it was so fun!!

Have you heard of Pocket Letters? Do you remember when ATC's (Artist Trading Cards) were big? Well, I still have all mine stored in a binder in baseball trading card sleeves! These Pocket Letters remind me of them - they are little 2.5" x 3.5" cards, usually following a theme, tucked into these sleeves and then folded into 3 parts so they fit into an A10 size envelope - ready to mail off to a friend! Often people tuck some paper crafting goodies into the back and enclose a letter for the recipient. There are websites, YouTube videos and Facebook pages dedicated to these crafty projects!

I decided to make my letter with a food theme and used papers from the Echo Park Made From Scratch collection as well as a food themed Smash kit and diecuts from a Ruby Rocket Pack. I used some BoBunny background stamps to add stamping and embossed details to my cards before layering my papers on and added some fun foodie washi tape!

On the back of my Pocket Letter I added some goodies my friend could remove and use in her own crafting - some baker's twine, diecuts, stickers, washi paperclips, extra papers, tea and ribbon. I tucked a letter I wrote into one of the pockets with a 'pull' tab and put my paperclips into a fun paper pocket.

Here's a few close ups of some of the pockets:

Background stamping and fun food diecuts-

Tim Holtz mini blueprint coffee stamps-

Twine wrapped around a mason jar diecut-

Cheese and Bread diecuts from the France Cricut Cartridge-

I added a recipe for Tea Biscuits that I've used for the last 20 years, handwritten on a recipe card I had - here it is if you want to try it out! 


This is my pocket letter folded into 3 and wrapped up with a doily and some rickrack! I can see this will not be my last pocket letter!!

Thanks so much for joining me today! I hope you are inspired to try something new today or maybe even send a Pocket Letter to someone you know. Don't forget to stop over to the Scrapendipity Online Store for some Canadian Shopping and have an awesome week!


Monday, May 25, 2015

Class with Dianne June 3

CRAZY BIRDS REPEAT!

On June 3rd Dianne will be running the CRAZY BIRDS class one last time!! If you have made the cards already, come make the frames! They are fun and great for a gift or to keep for yourself! Great sayings to go along with them! We will be making 3 completed frames!
If you prefer, there are still a few girls left who wanted to take the Bird CARDS.  With the cards we will make 5 cards plus matching envelopes!
If you sign up for the class please specify if you want to do the frames or the cards!

DATE: JUNE 3rd
10:30 or 6:30
COST: CARDS are 5 for $28 or FRAMES 3 completed frames for $32
Please contact Dianne to reserve your spot!
diannemahura@hotmail.com

Friday, May 22, 2015

Fun Friday Art Journal starters

     Here is a fun Art Journal idea
I am a member of a group that is just for fun
and offers a different prompt every month.
Start with a blank page take a low
tack painters tape and design some journal spots
you could do geometric pattern free hand, corners.
I did a irregular oval.
Next design your entire piece over top
and around the tape.
 Remove the tape and write in the spaces
left by the tape.
This is fun to do, you will need a craft mat
Hot glue gun, spray, blank journal page
Free hand a design on your craft mat with the
hot glue. Think, Large flower, free hand, sky's the limit.
Allow it to cool and harden.
Next place it strategically on your paper.
Spray over top, alternating position and protecting
previously sprayed area with paper towel.
Stamp and journal around your designs.
For all your scrapbooking journal needs


Wednesday, May 20, 2015

New To DIE FOR


These Magazines are the best inspirational and die combination.
 You will be so happy you have them on hand.


http://scrapendipity.lightspeedwebstore.com/

Tuesday, May 19, 2015

At The Park BoBunny Layout!

Good Tuesday morning! Karla here today after the Canadian Victoria Day Long Weekend, which our family enjoyed at home. I spent Friday with my 8 year old, Amie, cleaning and reorganizing her room! We cleared out a lot of stuff - some garbage, some goodwill, lots of old clothes... Then, we had a mommy-daughter date and went to a couple home stores where she picked out some special items for her room. It was so nice to just spend some time together and she was so thoughtful with what she wanted to put in her room. We had a lovely time and her room looks fantastic!

Later Saturday it actually snowed here! So, we stayed in and did lots of crafty stuff on Sunday, and then today we enjoyed a full morning at a local amusement park, Calaway Park. The kids had so much fun and it was so amazing to see how much they had grown and what rides they could now go on! Erica, who's 3, was super excited to be able to go on the planes and the swings!

Of course, I had to get in some scrapbooking! I wanted to do a layout with these sweet pictures of Erica in the baby swing. She's getting so big now that she really doesn't fit in it anymore and I know it's probably one of the last few times she's even going to want to get in it.

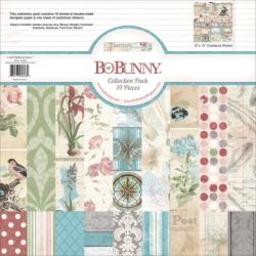
I used the BoBunny Primrose 12x12 papers (picked up from Selena in the Scrapmobile) that you can cut apart into journaling cards for this layout - I just love the browns, greens and pinks in this collection - and I layered the cards and pics into a grid pattern following the May Sketchy Challenge over at Canadian Scrapbooker Magazine.


I added some paper diecuts from a Maggie Holmes Crate Paper pack - her Open Book collection. I love, love, love these pieces! The 'e' included in the pack was perfect to add to the page, especially since Erica thinks anything that starts with an E spells her name!


I layered on the diecuts with the Primrose paper to create little mini pages within the grid - I love how they turned out! These would be perfect to do with pocket pages as well!


Thanks so much for joining me today! I hope you enjoyed a relaxing and crafty weekend and have a lovely week ahead!


Monday, May 18, 2015

Crazy Birds Cards or FRAMES with Dianne May 22

Well, they are indeed CRAZY
This last class filled up so fast Dianne is offering it again this week!!
Just a slight change, there will be a CHOICE
 to do the same cards as last week OR
do completely NEW project in FRAMES!!
 IF you are confused about this please email Dianne!diannemahura@hotmail.com
So, since so many wanted to take this class and couldn't come, or have now realized how fun the class was from talking to others, Dianne will offer the same cards THIS FRIDAY EVENING!!
However, if you didn't get enough of the birds and want to do them in FRAMES, she will run a table with those of you who want to do the frames!!!  The cost is slightly different but the INSPIRATIONAL FUN you will have will be the same!!! (remember, the verses on any of Dianne's projects can be changed!)

FOR THE FRAMES:
WHEN: THIS FRIDAY, MAY 22 at 6:30
(the frames will run again beginning of June)
COST: $32 includes THREE COMPLETED FRAMES!
TIME: 6:30
FOR THE CARDS:
We will be making 5 cards and you will decorate 5 envelopes to match!
WHEN: THIS FRIDAY, MAY 22 at 6:30
COST: $28 for 5 cards including envelopes !
TIME:6:30
PLEASE email  to diannemahura@hotmail.com if you can come!
 

Northwoods Watercolor class with Dianne May 27


So many people have requested a Northwoods class. So, Selena has them in stock! Dianne will be teaching the class using lots of Tombows, water coloring and glitter! IF you haven't take a class like this don't miss out, as they are always fun!
Dianne will be using Tombows to watercolor, they are one of the most popular watercolor mediums you can use!

DATE: MAY 27th
TIME: 10:30 am or 6:30 pm
WHERE: 44 Arbour Ridge Court NW
COST: $28 for 3 large cards!
Please email Dianne at diannemahura@Hotmail.com if you can come!
 

Friday, May 15, 2015

The LONG-WEEKEND


 It's time for all the Gypsy Hearted to jump in the camper and go!
 Sizzix has a new die that is just perfect
for this 3-D camper. Instead of the chipboard cut out, I used
poker chips for wheels. Just secure inside with a hot
glue gun before you decorate
I used white glue to secure the  pieces together.
that's why it has a rubber band holding it overnight to dry.
If I do it again. I will use a hot glue gun.
Note I had to adjust the pattern a bit as I
 used a light weight cardboard.
 If you use chipboard you should not have to adjust,
 only assemble the pieces. .
 
 I used scraps from a Bo Bunny layout for this project
It needed a little Gypsy banner on the back.
Add some silver yarn to the seams, jewels for lights
Use your imagination, add an awning. 
I ran some metallic paper through
the cuttle bug to give it a bit of texture

 Highlighted the screw ends with a dark marker
I replaced the original chipboard hitch cutout with
the ends from cheap foam brushes. Note the circle
placement marks on the front of the camper. I used
the end of a regular pin to secure the 'ball' to the arms.
These are from Prima sold as door knobs.
 Clip the closure end off of your pin.
Double back the ends with a pair of pliers leaving
them slightly larger than the opening. Push them into the
opening where the foam brush formerly was. 
 Cover all pieces with embossing fluid, I used a
silver to replicate that old chrome look.
NOTE: The metal ball holds the heat so set it
aside to cool down before handling.
Carefully score the hole with a blade in X or* fashion.
Test gently till the ends of your hitch poles
will slide inside with just a bit of resistance.
 
Have fun. This Retro Camper / Gypsy Caravan
is a fun project. You could use a simpler version
for party favors, a fantastic kids party craft.
Just pre assemble the shell and have them decorate
With  a selection of precut fun papers.

Leave the back open and decorate the entire inside?.
Ask Selena about the Die for this one!!! 
Have a GREAT LONG WEEKEND
for all you RVr's Here are some fun
RV Hacks I found on the Web